I always wanted to have a picture taken by somebody of me flying a plane, and a friend of mine found it on internet. I asked the owner for permission to publish it, so here it comes:
It was taken back in February 2012 on the return flight from El Hierro (GCHI) to Tenerife North (GCXO).
So this is me, flying low pass on a Piper Archer 2 (EC-JMT). Luckily this picture was not taken by a police because of speeding, lol 🙂
Yesterday I have absolved the second mission of my basic instrument flying module (BIFM).
Holding short of RWY 03L while Jetair’s 737 is landing
I am already starting to feel the difference between the first and second flight. I know what to expect from the plane which I wasn’t flying for almost 6 years and start to get more familiar with the airport as well. On the first time it was a combination of too many new things, which made it a bit more complicated. The manouvers helped me to learn to look inside the cockpit when flying into the clouds.
I feel I did some improvements since the first flight. It is easier to watch more than one instrument on time, to maintain a certain heading (however sometimes the plane still goes its own way, but we are working on it…), and to get orientated in the space without any visual references.
In the first mission I´ve basicaly stopped thinking about the Murphy’s law, that there is always a mountain hidden behind the cloud. I started to concentrate more on the instruments inside the cabin, without looking outside. Don’t want to get to confident, but I am simply feeling safer.
Today we have practiced some new manouvers; and the weather was just as perfect as during my first session! Clounds, clouds, clouds… Shortly after take off, my instructor covered the windshield, to not to get disctracted by looking outside.
My “inflight entertainment” 🙂
I would say, actually I can´t believe that I am paying for having these kind of views from the plane, haha. I always wanted to fly to enjoy the views of the countryside and now I see this (lol). A good pilot is always learning, so it is definitely worth it! So this is my inflight entertainment, to look on a piece of a chart and a binder 🙂
Finaly we took the cover off from the windshield and we have continued the flight in real IMC conditions looking on the instruments inside the plane. It was “real”, as it should be. You can’t ask more than this, to have real IMC conditions on a place, where the sun is shinig more than 360 days a year…
Perfect IMC conditions
Actually the whole week I was hoping to have this kind of weather; with clouds and poor visibility (on normal occassions when I fly I pray for CAVOK and good VFR weather).
In todays missions we have practiced descent and climb at 500ft/minute maintaining certain heading and speed and rate of descent/climb. It requires quite a lot of work and concentration. But once you discover how to do it right, it goes easier.
The important thing is to get used to scan/crosscheck all instruments at once and keep an eye on every instrument simultanously. Try to not to focus (stare) on one instrument only, otherwise the plane starts to go its own way.
We have made coordinated turns as well: take your current speed, divide it by 10 and add 7 degrees. This formula will give you the angle of bank to be maintained during the standard turn.
After today´s flight I was not exhausted like during my first mission, but there is still a lot of work to be done. Actually somehow it makes fun. I know, that I am improving my skills and doing something for the safety of the flight. The only strange thing is, that I haven´t seen anything at all during this 105 minute flight, as I was not able (allowed) to look outside. 🙂
I´ll have to work more on the interceptations of the radiala and I look forward to the next mission.
Turning on final RWY 03L
On final RWY 03L at Al Gando airport
Today’s route
I like quite a lot the debriefing. TO hear what went good, what went wrong, I can ask any doubt I have to a person who knows how it works. It is good to go back to the basics and refresh the knowledges.
A good thing is also to take notes from the debriefing; or record the flight. When you watch it at home, you detect things you could have done different way, and improve your skills before your next flight.
On the image of my today’s flight I can see that I haven’t applied correctly the wind correction when flying a certain radial, now I clearly see that I have to have it on my mind next time.
I would really recommend this course to every PPL pilot, actually it should be a part of the basic PPL training. I am quite sure it makes me a safer pilot. I would even love to make the whole IFR training, who knows, maybe in the future?
I have decided if possible, when abroad on holidays or on a trip, to make a flight in a this place to fly in a different environment that I am used to fly normaly.
Today’s route
On this manner I learn new airports, gain new experiences and discover different places and enjoy flying. On this visit of my homecountry Slovakia I wanted to fly along and above our highest mountains Tatra (2.655 mtrs ASL) and simply enjoy the views. Unfortunately the weather conditions were bad so we had to head the other direction and the mountains will have to wait till the next time.
Dynamic WT-9 (OM-AKB), Ocova airstrip
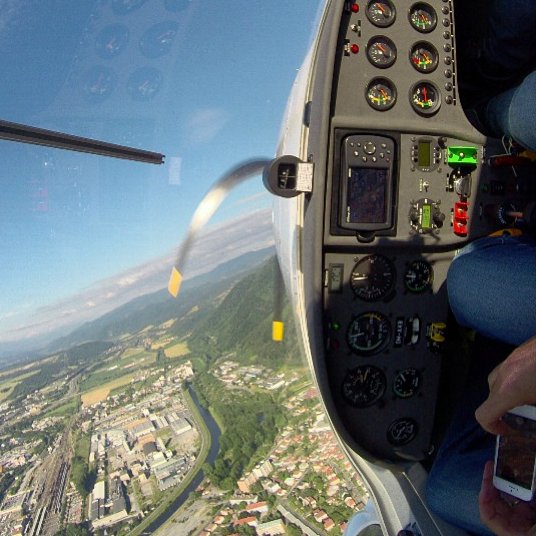
We took off around 18 hours local time from Ocova aerodrome (LZOC) from a nice grass strip (RWY 08) on board of a light plane Dynamic WT9 (OM-AKB) heading my hometown Banska Bystrica to take some pictures and to enjoy the views. Over the city I handed over the controls to the safety pilot (FI as well) and he performed some steep turns so I could make better pictures 🙂 :-). It was fun to put the plane in this position.
Steep turn over Banska Bystrica
Following the highway and the gps we headed southwest to the City called Nitra (LZNI). As I am not used to fly from and to grass strips, it is for me more difficult to recognize the (air)fileds. To be honest, I was just above it and was still searching for it. 🙂 🙂
Nitra (air)field (LZNI)
As there was nobody, we continued the flight to Partizanske (LZPT), made a low pass and continued to Bojnice.
Castle Bojnice
After two 360′ turns over Bojnice we took a couple of pictures and landed on the close Prievidza (LZPE) strip. On this occassion I was able to spot the strip, which I was very proud of, but on final I was not sure, which part of this bright field is the part I should land on. Green is green, somehow everything looks the same. Haha
Landing at Prievidza (LZPE)
At this aifield there is the factory where our plane was made (Dynamic WT9).
Aeroklub Prievidza
I was realy surprised how good the local club restaurant was. After having a great cabbage soup, we continued our flight home. Initialy we have climbed up to 5.000 feet and flew over some nice mountains followed by descent and low pass on Sliac airport’s RWY 36 (LZSL).
Low Pass at Sliac Airport (LZSL)
After departure right turn into the dusk and after a couple of minutes we have landed back in Ocova (LZOC). Can’t imagine any better idea how to spend an evening than going for a dinner to another airfield by a plane.
Landing at Ocova at dusk
Safe landings!
PS. The best thing is, that they are no landing fees to be paid on these grass strips!
My initial intention was to make a Night VFR rating, because of these 2 reasons:
1. To gain experience flying without visual references and to improve the safety of the flight in the case of flying into not ‘best VFR flying conditions’
2. To land at night and enjoy the landing strip iluminated as a Christmas tree 🙂 🙂
So I think enough reasons to decide to go ahead with the training!
I was already so far to start with the night VFR training, when I spoke to the training center again and discovered even a better option: ‘Basic Instrument Flight Module (BIFM)’.
The BIFM forms a part of the instrumental flight rating course and you basically learn to fly without external visual references. During the course you practice horizontal flights, climbing, descending, turns in level flight, climbing, descending, recovery from unusual attitudes, stalls, etc.
It takes 10 flight hours to acomplish this course after which a certificate will be isued. If you decide to finish the IR course, you have already done the first 10 hours, and you just continue with the missing 45 hours.
I am doing the training at Canavia, and as the school is situated on the other island, to reduce the costs for moving around I try to do 2 missions at once (of total 10 missions).
As I am only VFR rated, I always look out the window for nice weather conditions. On the Canary Islands, you can basically fly 360 days in a year and just today, on the first training day, the weather was really not the best one ç(IMC conditions); a lot of fog and low clouds.
I phoned the FI to ask how he sees the situation and his answer was: “Perfect, as we are going to fly IR!” Wow, under normal circumstances we would have to cancel the flight.
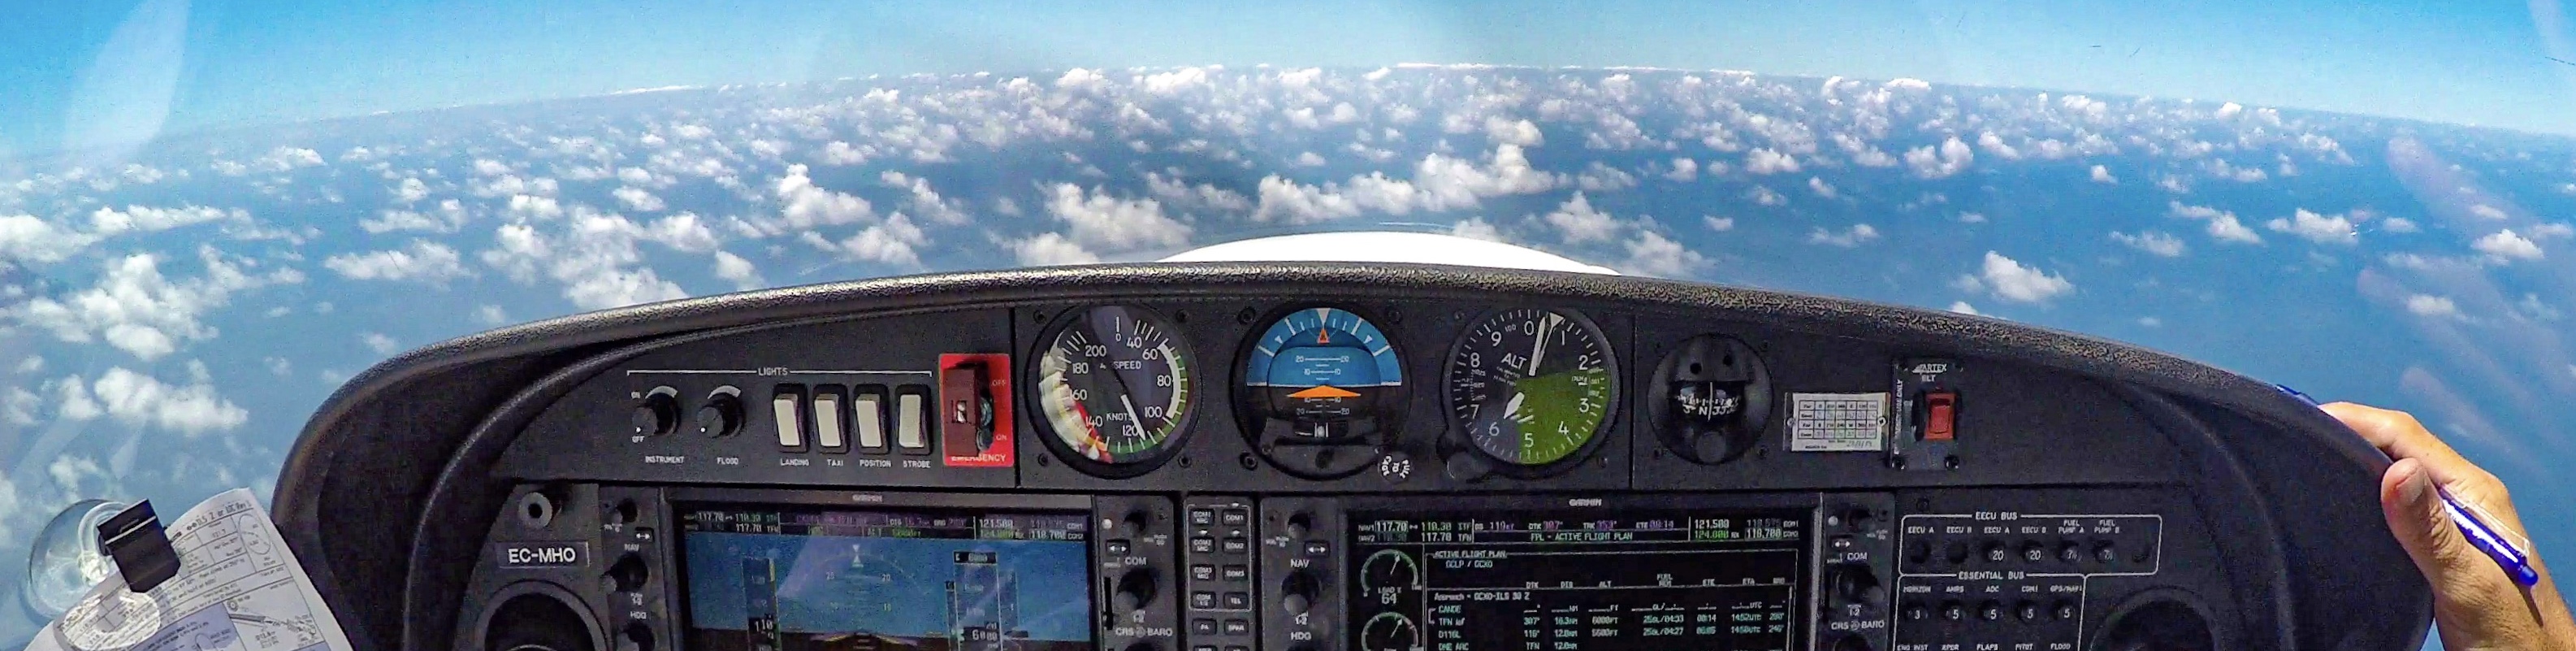
As I knew the training should be done on a VFR rated aircraft (Tecnam Sierra), it sounded a bit strange to me to be flying without any references. However, I have done my PPL on this plane and it is equipped with a artificial horizon (very very helpfull) and a Garmin 430 as well (which we won’t be using during the flight), and VOR/ILS.
After I arrived at the Gran Canaria airport, where the school is situated (very recommendable, as they have very sharp prices and a good fleet), I’ve learned my FI Yeray, and after finishing necessary paperwork, we went down to the general aviation parking and started the preflight check of our Tecnam. Last time I flew on this ‘light aircraft’ was about 6 years ago and it is a bit different to fly a light plane like this in comparation to the Piper or Cessna I am normally used to fly.
We took off, and I literaly do not know where we have been during this 1:40 minutes long flight… Somewhere in fog, without looking outside (as I normally do)…
Flying in IMC conditions
The first big difference after we left the airport was, that I had to start focus on the instruments inside without looking outside at all! Checking the horizon, heading (on the compass turns to the opposite direction than the gyro) and follow the outgoing radial of the VOR.
It was not necessary to wear the hood; there was nothing outside you could see! Fantastic weather to practice the flight!
Flying with no visual references
We were practicing turns (10, 25, 30 degrees), descent and climb and leveled flight. You need to monitor several instruments at once and to be concentrated, otherwise the plane starts to go its own way…
The flight instructor used the conditions to skip a couple of lessons and to practice a stall and recovery from unusual situations. I had to look outside and he putted the plane in a turn and descent; my task was to recover it by looking on the artificial horizon.
Stalling the plane in normal conditions looking outside feels different than with no visual conditions. You actually do not realize that the plane is stalled, the stall horn warns you and you see it on the instruments.
Flying with no references requires pretty much concentration than flying around in a nice VFR weather, and I was actually pretty exhausted after this ‘short’ (1:40 min) flight. I am sure that the autopilot is a big help in this conditions. Besides this, I had to pay more attention to fly a plane I was not used to fly normally, and the turn coordinator was not working, so it added an additional work load to me. In the next missions we will train fault of some instruments as well, so it was not bad to fly like that. But maybe to many things together at the beginning.
The good think is that I have recorded the flight as well, so I can reproduce some of the manouvers in order to improve myself before the next mission starts. And this will be soon as well, so I look forward to the next training flight!
We were flying with my friend around the island, he is a commercial pilot and instructor as well; and it seems that the flight was a bit “boring” for him without making any manouvers, stall recoveries, etc.
So he just asked me during the flight: “Can you make at least some stall or something to make it a bit more entertaining”?
My response was pulling back the throttle maintaining the altitude with the yoke and centering the plane with the pedals until the Cessna stalled, followed by the recovery. It is pretty amazing, how difficult it is to stall a Cessna, it stays simply hanging in the air… If I compare it to the P28A which I use to fly more often, the Piper would be a piece of a brick falling from the sky 😀😀😀 comparing to the Cessna. Somehowe after this couple of flights I am starting to like the Cessna as well.
I have recorded the stall recovery with the Gopro mounted in the cockpit; unfortunately forgot to delete the files from the Gopro hanging outside on the wing, so I was only able to take 2-3 pictures (grrr) with it. It was hanging outside for nothing (creating more drag). I will have to create my personal “gopro checklist” haha before going out for flying to avoid bad surprises like this one. However, I like those 2 pictures i’ve taken… Quality before quantity (a good excuse), haha.
Somewhere over La Victoria, North Tenerife
It seemed that stalling Cessna was not enough so we have said: “engine failure”! Why not? First set the best gliding speed (around 70 kts) and searched for a field to land. Pretty difficult on a hilly volcanic island like Tenerife…
Searching for a field to land
The first and probably best option to avoid ditching in the sea was a golf course. We were gliding from 4’500 feet for a while and were trying to calculate the approach taking in consideration the weather conditions, etc. (we had a tailwind, so after the final turn we could be short of the field and…. do not think about the worse…).
When on the final of the golf field (almost with the golf players in sight), we have performed a go around and continued with the island tour. It was a very good excersise; sometimes it is necessary to go back to the basics and train the emergency procedures.
The funny thing is that a couple of days later a friend of mine who was playing on the course that day asked me: “Were you flying on saturday?” I answered, yes, it was me 😀😀😀. “I was thinking to hit you with the ball”, he said… I thought probably he recognized my flying technique ;-).
The most of us are flying to enjoy the 100$ hamburgers. In Spain we could speak about something similar, as for example “100$ paella”.
My last flight went to La Palma, together with my friend Daldo and his wife Virginia as passenger.
Today’s crew
I was flying the inbound leg and we were cruising at 8,500-9,000 feet. Pretty nice views over the Atlantic Ocean, the sea was very calm, but we were having some headwinds of 20 kts which made this flight a bit longer and of course a bit more expensive ;-), that is why I speak about 200€ paella ;-).
Some different views of Tenerife
Actually I enjoy flying high(er), as there is normaly less turbulence and you can enjoy better views. Also, in the case of an engine failure, the range of possibities of gliding or trying to restart it, are better, as you gain time. And also, you feel like you are flying a real arliner ;-). So there are only a advantages of flying at higher altitudes.
Cruising at 8,600 feet (Sorry for the bad quality)
The icing was forecasted for this day at 9,000 feetm the OAT was around 2 degrees, but no ice was forming on the wings. We were cheching it constantly, for just in case, however we were not flying in the clouds and the day was pretty sunny as well.
Passing La Gomera island
Cruising over the Atlantic ocean at 9,500″
Reaching La Palma island we have maintained 9,000 feet and made some cloudsurfing. The weather forecast for today was some rain and also a front was comming from NW. We have decided to do this flight anyway, as the visibility was ok, no clouds were in sight, and in the case the weather would starting to change, we would return back to our base airport.
Flying over the clouds, reaching La Palma island
Cloudsurfing over La Palma and the rainbow
After this short cloudsurfing, we have started our descent to the visual point Sierra, in the south of the island. Being so high took as a while to descent and make some nice manouvers between the clouds.
Descending through the clouds
Finaly after 1,30 hour long flight we have landed at the La Palma’s “El Mazo Airport”. This airport is considered one of the world’s most complicated approaches, however with its 2,2 km long runway it is nothing special for our Piper ;-).
Seconds before landing at La Palma
Our Piper was parked as it should on a nice place, where even an Airbus 330/340 could be parked. A realy big honor for this plane ;-).
Just a quick selfie to prove that the Piper was parked on the A330 stand and that I was there as well 😉
We knew, that we had not much time, as the storm was comming sooner or later, so we have decided to go quickly to the restaurant Casa Goyo, situated under the extended centerline of the runway, just between the extended centerline´s lights. They have a lot of specialities, good quality-price relationship and also very good seafood. This restaurant is situated in a walking distance from the airport, some 10 minutes.
Restaurante Casa Goyo La Palma
It consists of small wooden houses, where you can sit, or small rooms, where you can enjoy some privacy as well. We had some paella, which was already ready and we didn’t had to wait, as we had to be pretty quick. So to come over to La Palma to eat this small plate of paella costs around 200€ ;-); not to shabby 😉
Inside the restuarant (bad qualiry foto, grrr)
This one is better 😉 Waiting for the paella.
After the lunch we took a taxi (6€) and we hurried up back to the airport to pay the taxes (18€), made our new flight plane and departed direction Tenerife. There were pretty much clouds than earlier this day, so Daldo had to climb up to 10,000 feet and fly around the clouds to avoid them. The views were even more spectacular.
Cruising at 9,700″ Pretty awesome, isn’t it?
Flying between the clouds
Flying over clouds at 9,700″
The north coast of Tenerife can be seen through the clouds
Anaga
On final RWY 30 at Tenerife North Airport
Only a couple of minutes later after our landing, when the plane was parked outside the hangar, it started to rain and the visibility dropped down significantly. This was a perfect planning, in the other case we would have had diverted to the alternative Tenerife south airport.
The Piper is parked outside the hangar and the rain is comming
A short video of the descent, cloudsurfing, approach and landing at the La Palma Airport. The Gopro has been mounted on tail of the plane.
It has been a while since my last flight, the meteorology was not the best one, so I had to wait long to get airborne… Then maintanence on the piper had to be done so I´ve decided to fly again the club´s Reims 172.
I have purchased a second Gopro, this one is the latest model Gopro Hero3 Black+ and the difference between the White and this one is huuuuuge! The quality of the picture is much much better than of the White model. They shouldn’t be selling this model (white), as it is realy bad.
Today there was a very nice visitor to the Tenerife North Airport; the Beechcraft B-200 Super Kingair, privately held, was resting on the ramp. The plane was there already for a couple of weeks.
Beechcraft B-200 King Air, reg. N537EM
My today´s flight was scheduled with the club´s Reims 172 (the european version of Cessna 172). The last time I flew Cessna was 13 months ago… So why not to try it out again, to enhance my flying experience?
Reims 172 Skyhawk II, reg. EC-JGP
I have polished the windshields and have installed my 2 Gopro´s; of course, that the cheaper version was installed outside on the vertical stabilizer ;-). Using a lot of duct tape to secure it on the plane. I have spoken to the maintenence guy and they are going to install there an adhesive, which will offer a better views and will be easier and quicker to install, as it won´t be necessary to clean and polish the surface, etc…
Gopro Hero3 White on the Rudder
The new Gopro Hero3+ was installed inside and connected to the Intercom to record the ATC communications, which worked perfectly.
GoPro Hero 3 Black+ installed in the cockpit of the Reims/Cessna
Here you can see the connection between the camera and the Intercom to record the ATC communications. To see, what do you need to connect it, you can read more in my previous post.
Gopro connected to the airplane´s intercom
Having 2 camera will force me to get a better editor and spend even more time editing the videos… 😉 The views are realy nice. This one was taken with the camera situated outside (Gopro Hero3 White):
Cleared for take off RWY 12
Over the clouds
Unfortunately the battery died, so it wasn’t possible to record the landing… Inside, the Black+ made these pictures. I have to admit, that I preffer the look from Cessna/Reims, as the windshield is in one piece and it is not divided in 2 like at the Piper:
Take off roll
Over the clouds
Besides this I took a lot of pictures above the clouds with my Iphone. The countryside gets so nice and green in the wintertime here in Tenerife:
San Andrés
Playa de las Teresitas
Santa Cruz de Tenerife & Pico del Teide
Santa Cruz de Tenerife
Anaga
Anaga
I have edited a 3 minutes long video of this short local flight with the 2 cameras on board. More staff will be comming 😉
How to record ATC and intercom communications with gopro ?
I was trying to sort out the connection between the airplane’s radio equippment and the Gopro so I could record the communications in a better quality without any external noise.
Searching on internet I’ve found a cable, which costs around 33€ (46US$) on MyPilotstore, but the problem is the cost of shippment to Europe which makes it pretty expensive (as it is still only a piece of cable), so it can cost roughly about almost 60€ (without shippment costs).
gopro hero 3 aircraft audio adapter (33€)
Gopro hero 3 3.5mm Mic Adapter (25€)
It would be of course the easiest way how to get everything to work.
I was quite sure, that there have to be another and much cheaper solution. I have searched between all my cables at home, if there would be something usefull, how could I connect the Gopro with the Radio. I have found 2 usefull pieces: a plug adaptor (aviation to 3.5mm) and a 3.5mm Audio Male to Male Extension Cable, which is 1 meter long and will give me some freedom when placing the camera different places in the plane and keeping it connected to the intercom.
To connect these 2 pieces with the Gopro Hero3, I still need the Gopro Hero3 3.5 mm Mic Adapter. I’ve used an alternative one bought on Ebay for less than 2€ shippment included, and it works perfectly. (I don´t know whether the adapter would be still available to buy at later point from this seller, but I am sure there are plenty of other sellers on ebay offering this article.) I´ve also noticed, that even if they sell these cables on ebay, sometimes they don´t work. Went to speak to a specialist, he opened the cable and it said that the difference is, that in some of these they don´t put the resistence, so the gopro doesn´t recognise the cable. Similar situation happens to your iphone, if you try to use an authorized cable… Without the resistance it doesn´t work…
The plug adapter can be purchased at any music shop like I did, and it cost only a couple of euros.
Camera, Plug adapter, extension cable, Mic Adapter
Here you can see them connected to the camera.
Camera, Plug adapter, extension cable, Mic Adapter – connected
Now you could connect the camera with your onboard radio equippment and start to record the conversations. Find a free plug (at one of the passenger seats) and record. As we mostly fly 2-3 people on board, there mostly one available to use it for the recordings. If you use to fly with 4 people on board, you will probably need the original cable which is much more expensive (as you have no spare plugs available on board of the plane).
You can use the passenger’s cords
Plugged in and ready!
If you wish to check at home that the connection works, and the camera records the sound, just connect your Gopro camera to your mobile phone, turn some music on, and record with your camera. After that you will see that the music from your phone has been recorded on the camera, and no outside noise can be heard in the video.
To be sure, that my invention will work on the plane, I’ve plugged it in and recorded the communications with another person speaking through the radio. No outside noise can be heard, only the communications between us. Unfortunately the weather was bad, so I was not able to test it in flight, but I’ll do so soon! Here is also a video about this solution; at the end you can hear how it worked out. It is recording only conversations through the intercom when the PTT is pushed. Note: Connect the cables to the camera and intercom before the camera will be turned ON, otherwise it can happen, that the camera won’t be recording the sound (it happened to me as well…)
If you have any questions, please do not hesitate to ask. If you have spare cables at home, maybe you can save some $$… By the way, this method works also with my Gopro4 Silver… Fly safe!
Flying in Canaries is possible the whole year, also in december. The only thing is, that due to weather conditions, sometimes you have to have patience in the weather in the case there is fog and clouds until they disappear. Luckiy it is not necessary to scratch the ice ;-).
Mostly in the winter months there is more rain in the north part of the island, where the aeroclub is situated (at 2.078 feet). Therefore it is sometimes difficult to depart in the early morning hours. It is neccesay to delay the flight and to wait and hope, that the sun warms up the air so the clouds (mostly stratus and cumulus) disappear to go ahead with a VFR flight.
Waiting for the weather improvement
On this occasion the weather on our arrival around 9 a.m. was not the best one, some very low clouds were covering the runway, so no VFR conditions were available and LVP (low visbility procedures) has been activated as well…
The time on the ground has been used efectively to polish the windscreen and windows; I love to have a good visibility and the images are pretty much better!
Preparations for the flight in the hanger
The theory worked today and after 2 hours the weather has improved and we were able to go ahead with the flight.
Today’s route was scheduled from Tenerife to La Gomera and back, with a complete round trip and some low passes at La Gomera airport (GCGM) and the former island’s airport “El Revolcadero”. The weather on route was fantastic and the wind was calm.
Route Tenerife – La Gomera – Tenerife
After departure we have followed the coastline heading south, continued to the west to La Gomera. I flew several times to La Gomera, but never came closer to the capital San Sebastián de La Gomera to see it from the air. Today it was the moment to explore how the area looks like from the air… The coastline is impressive, there is a lighthouse situated on the small cliff. I loved how the coast does look like; this part of the coast with its lighthouse remembered me at the coast of Ireland…
Lighthouse at San Sebastián de La Gomera
Harbour at La Gomera and Naviera Armas ship
We have completed the island tour and continued to the east back to Tenerife North airport (GCXO), where we have landed on the Runway 12. It is very nice to land this on the RWY 12 in the winter time, as the grass gets nice green. Following Air Europa’s 737 we have proceed to the parking.
On final RWY 12 at GCXO
Following Air Europa to the parking
I have tried to “squeeze” the whole trip into a 3 minute “short” “fast forward video”. Hope, you´ll enjoy it as much as we have enjoyed the flight!
Last saturday the weather forecast was not the best one, but we have decided to go to the North Airport (GCXO) and see if it was truth… Unfortunately yes….
Not the best flying weather
This airport is situated some at 2.000 ft and the base of the clouds in the Canaries is normaly around 2.500-3.000 feet, and the best place is over the airfield… Normaly around midday the weather improves, when there is sun and a little wind, the clouds usualy disappear.
We have used the time to prepare the aircraft, I have polished the windows and have installed the Gopro inside the cabin. Since I saw a coupple of nice videos made from the cockpit, I have decided to install it inside.
Todays place for my Gopro Hero3
The weather started to improve, so we have pushed our plane out the hangar…
Piper ready for pushback…
After the rain everything looks more colorful
The leg to El Hierro was flown by my friend Daldo and we had a passenger on board Oliver, who loves flying as well.
The crew on the way to El Hierro
The crew 😉
The flight was very smooth, almost no wind and no turbulence, so we have descended near La Gomera to see closer the rocks called “Los Organos”.
Los Organos, La Gomera
We have enjoyed a short round flight around the island El Hierro.
El Hierro in sight
El faro de Orchilla
Flying along the coast at El Hierro
Landing at El Hierro Airport (GCHI)
Arrived at El Hierro Airport
After the landing we went to Valverde for some lunch, came back, paid taxes, made the flightplan and departed direction Tenerife. On the way back, I was at controls and Oliver was able to fly for a while as well. He did a good job! With his experience from flight simulator he was flying the plane (almost) better than me ;-).
Our flight back, Oliver at controls
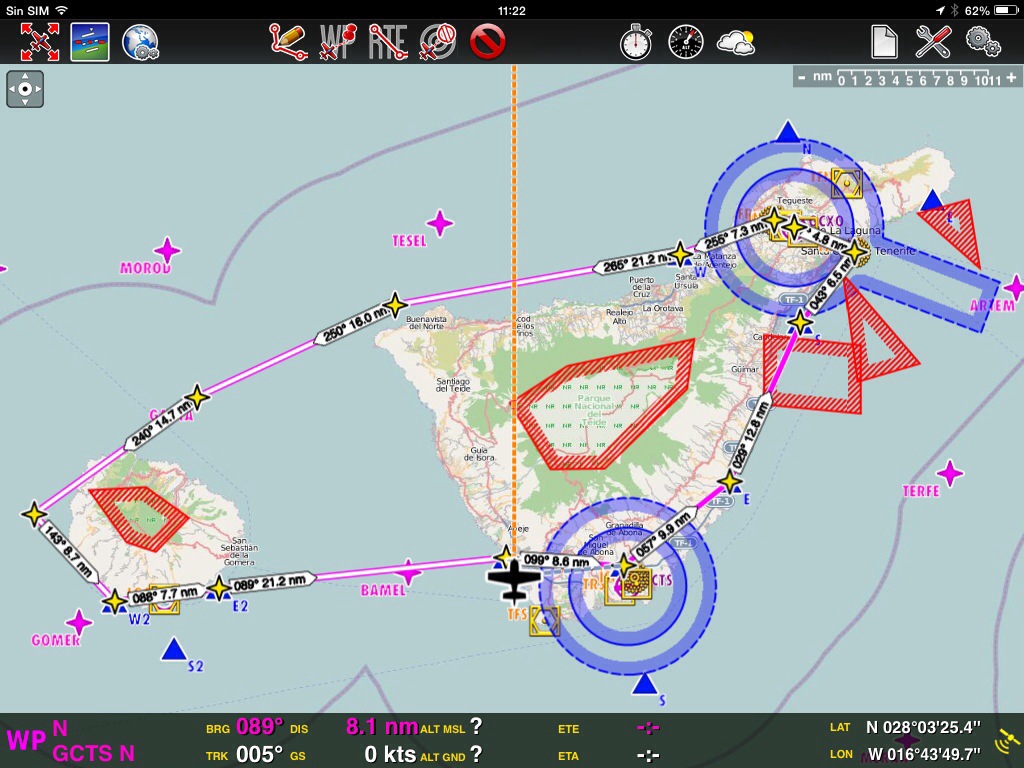
On the way back I have performed 2 low passes at La Gomera Airport, one at the former La Gomera’s Airport “El Revolcadero”, following the next low pass at Tenerife South Airport (GCTS).
There were plenty of clouds on the way back, but luckily Tenerife North Airport awaited us with some nice weather so we could landed without to having divert to the alternative airport.
Return flight El Hierro-La Gomera-Tenerife South-Tenerife North
When holding over Playa de las Américas we had very nice views over the zone.
Holding over Playa de las Américas
It is actually strange to see, that the people were cutting from the volcano to built their houses on this hill…
Los Cristianos from the air
Landing at Tenerife North Airport (GCXO). I was happy that my friend Daldo used his new Iphone 5S to make the video of my landing, with its 60 frames per second you do not see the propeller. I have edited the video with iMovie, sincronized both videos (Gopro and Iphone 5S) and this is the result:
After the landing at Tenerife North Airport, a nice Learjet was parked on the general aviation platform (reg. D-CGRC). I´d love to have a jet like that, but unfortunately my garage is not big enough :-).